
In cloud environments like Azure, safeguarding resources from accidental or malicious deletion is of utmost importance. To ensure the integrity and security of your cloud infrastructure, Azure Policy provides a powerful feature called DenyAction Effect. In this blog article, we will explore the significance of protecting resources from deletion and how Azure Policy’s DenyAction Effect can be utilized to enforce resource protection policies effectively.
Why Protecting Resources from Deletion is Crucial
- Accidental Deletion: Mistakes happen, even to the most experienced users. Unintentional deletion of critical resources, such as virtual machines, databases, or storage accounts, can lead to data loss and operational disruptions. Recovering or recreating these resources may involve significant effort, time, and cost.
- Malicious Actions: Unauthorized individuals may attempt to compromise your cloud environment and delete resources to cause harm, disrupt services, or steal sensitive information. Protecting resources from unauthorized deletion is essential for maintaining the confidentiality, integrity, and availability of your data and services.
In this scenario, we have a VNet set up by the platform team, enabling communication outside the subscription through a hub-spoke configuration. To prevent accidental deletion of this VNet, we have implemented a specific policy that enforces its protection. While locks could serve a similar purpose, they can be removed by individuals with Owner permissions, potentially compromising the safeguarding measures. In contrast, this policy can be strategically placed at a higher level, providing enhanced security and offering more robust protection for the VNet.
Creating the policy:
Step 1: Sign in to the Azure Portal
- Open your web browser and navigate to the Azure Portal (https://portal.azure.com/).
- Sign in with your Azure account credentials.
Step 2: Access the Azure Policy Service
- Once signed in, click on the “All services” option in the left-hand menu.
- In the search bar, type “Policy” and select “Policy” from the results. This will open the Azure Policy service.
Step 3: Create a New Policy
- In the Azure Policy service, click on the “Definitions” tab on the left-hand menu.
- Click on the “+ Policy definition” button to start creating a new policy.
Step 4: Define Policy Settings
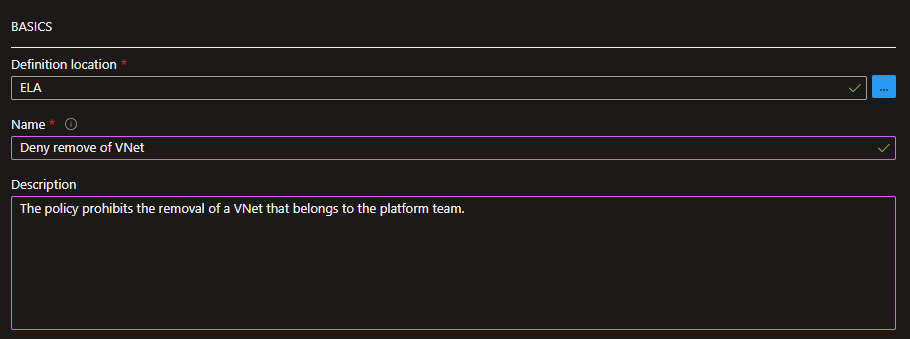
In the “Basics” tab, provide the following information:
- Name: Give your policy definition a descriptive name.
- Description: Add a brief description of the policy’s purpose and scope.
- Category: Choose an appropriate category for the policy (e.g., Security, Compliance, etc.).
Step 5: Set Policy Rule
- In the “Policy Rule” tab, you’ll define the specific rule that the policy will enforce. You can either:
{
  "mode": "Indexed",
  "policyRule": {
    "if": {
        "allOf": [
          {
              "field": "type",
              "equals": "Microsoft.Network/virtualNetworks"
          }
        ]
    },
    "then": {
        "effect": "DenyAction",
        "details": {
          "actionNames": [ "delete" ],
          "cascadeBehaviors": { "resourceGroup": "deny" }
        }
    }
  }
}
Step 6: Review and Create
- Click on the “Review + create” tab to review the policy configuration.
- Ensure all the details are accurate, and the policy rule is correctly defined.
- Click on the “Create” button to create the Azure Policy.
Step 7: Assign the Policy
- After creating the policy definition, go back to the “Policy” service.

- Click on “Assignments” in the left-hand menu.
- Click on “+ Assign Policy” to assign the policy to a scope (Management Group, Subscription, Resource Group, or Resource).
- In the “Scope” dropdown, select the appropriate scope for the policy assignment.
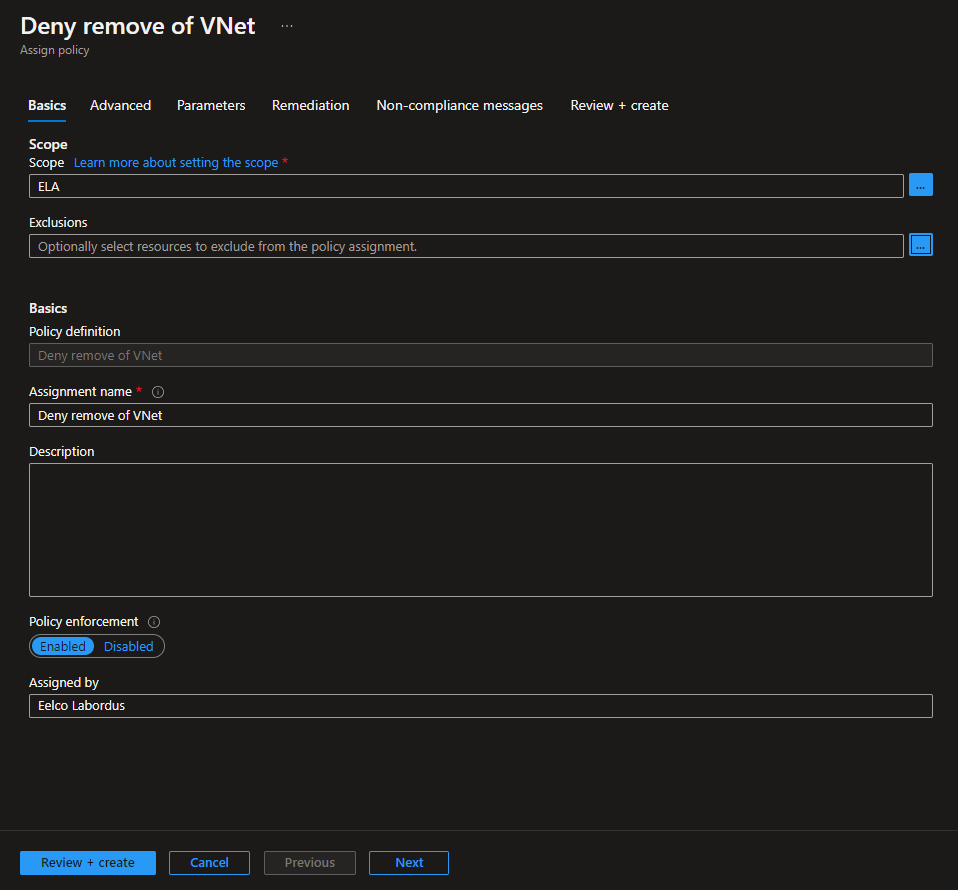
- Search and select the policy definition you created earlier.
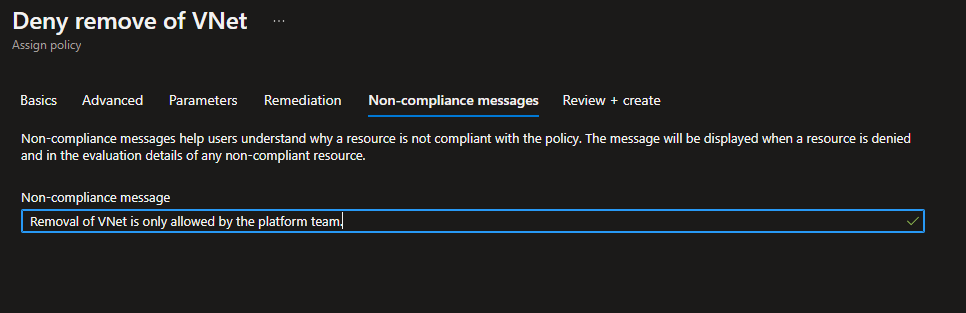
- Generate messages for non-compliance
- Click on the “Review + create” button and then “Create” to assign the policy.
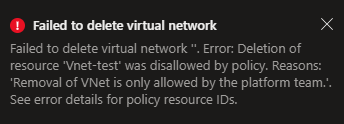
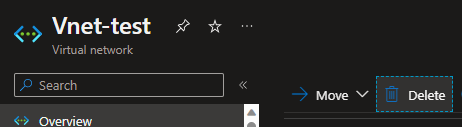
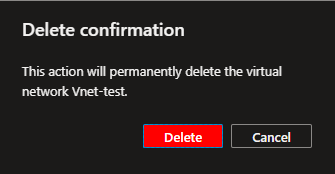
After the policy has been assigned, we will attempt to delete one of the VNets that has been deployed. In this example, the VNet deployed is named “Vnet-test” and is part of the Resource Group “Vnet-test.”
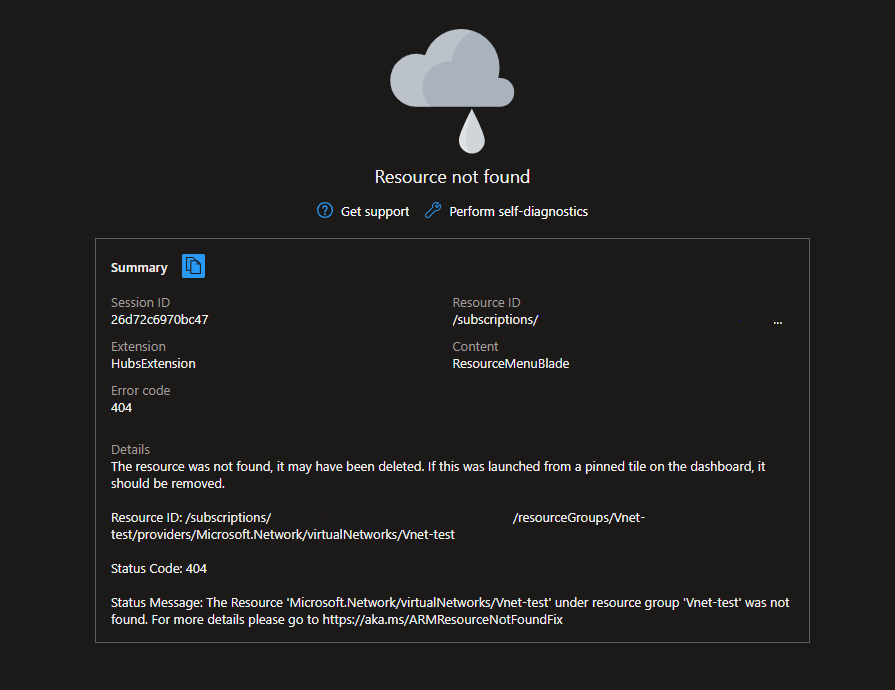
When we try to delete it, we encounter an error message stating:
Hooray! The policy has been successfully implemented, and it’s working as intended! 😊
Removing the VNet
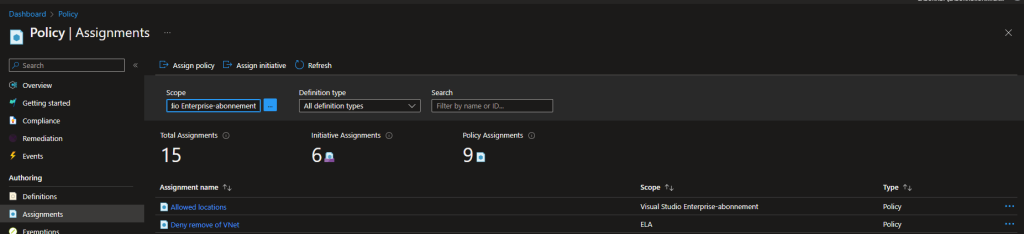
However, suppose we wish to delete only this specific VNet without removing the policy assignment. In that case, we must establish an exemption for this particular resource within the policy. To achieve this, we can return to the policy assignment and make the necessary adjustments.
Step 1: Identify the Policy to Exempt
- In the Azure Policy service, click on the “Assignments” tab on the left-hand menu.
- Locate and select the policy assignment from which you want to create an exemption.
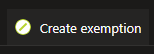
Step 2: Initiate Policy Exemption
- In the policy assignment details page, click on the “Exemptions” tab.
- Click on the “+ Add exemption” button to start creating a new exemption.
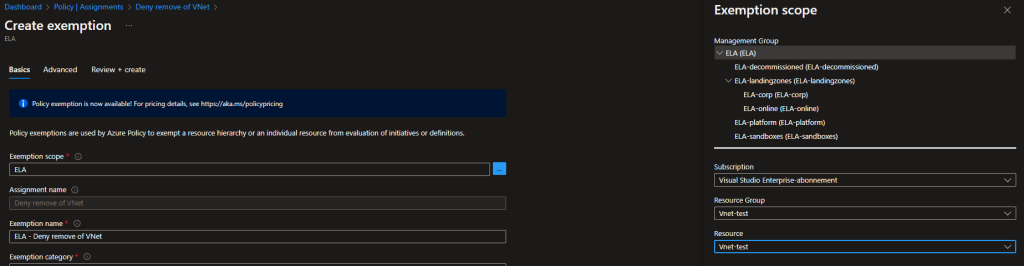
Step 3: Define Exemption Details
- In the “Basics” tab, provide the following information:
- Name: Give your exemption a descriptive name.
- Description: Add a brief description of the exemption’s purpose and scope.
- Select the Exemption scope, in this case the resource we want to delete:
Step 4: Review and Create
- Click on the “Review + create” tab to review the exemption configuration.
- Click on the “Create” button to create the policy exemption.

If you have created a policy exemption for the “Vnet-test” resource, you should be able to proceed with the deletion process without the policy blocking the action.
Since you have applied a policy exemption for the “Vnet-test” VNet, the deletion should go through successfully without any interference from the policy enforcement.
Utilizing the DenyAction feature from Azure policies is a powerful means of safeguarding your environment. By applying this feature, you can effectively enforce resource protection policies, prevent accidental or malicious deletions, and maintain the integrity and security of your cloud infrastructure. Additionally, policy exemptions offer a valuable tool to handle specific cases where certain resources need to be exempted from policy enforcement temporarily. These combined measures ensure a robust and secure cloud environment, allowing you to manage exceptions while upholding the overall effectiveness of Azure policies.
For more info Understand how effects work – Azure Policy | Microsoft Learn